Essay - Published: 2022.07.12 | containers | docker | gitlab | google-cloud |
DISCLOSURE: If you buy through affiliate links, I may earn a small commission. (disclosures)
Manual deployments are slow and prone to breakage. In 2022 your deployment pipeline should be entirely automated - and there are a lot of tools available to make this easier than ever.
In this post, I'll walk you through how to build and deploy your containerized app from your GitLab repo to Google Cloud Run.
First, let's go over how the approach works from a high level.
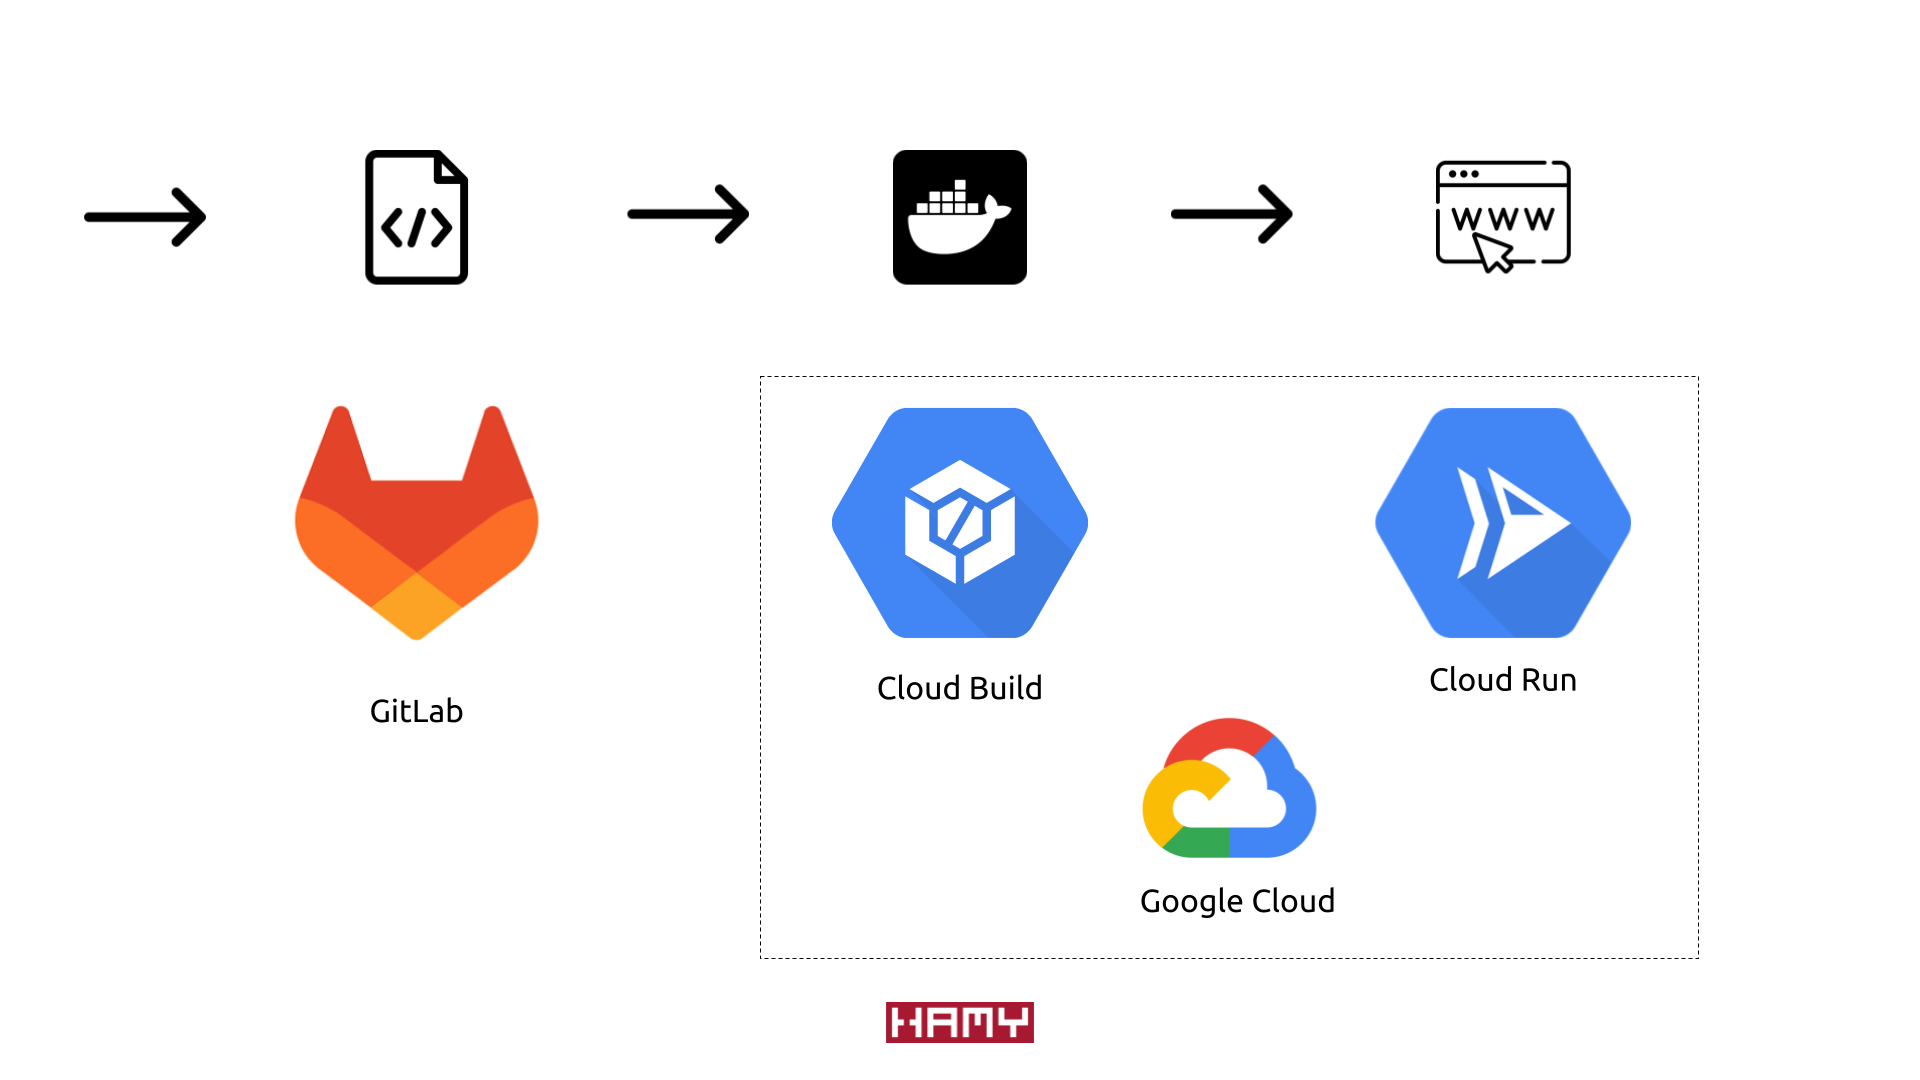
The components we'll be using are:
Dockerfilegitlab-ci.ymlcloudbuild.yamlRead how / why I use Cloud Run to keep costs low.
 GitLab to Cloud Run deployment pipeline
When we push an update to our GitLab repo's main branch we'll trigger our build and deploy pipeline:
gitlab-ci.yml file
cloudbuild.yaml
DockerfileFor this example, I'll be using the CloudSeed SaaS template which includes two pre-containerized apps to deploy:
Let's get started.
The first thing we need to do is setup our Google Cloud project so that it can work with Cloud Build and Cloud Run.

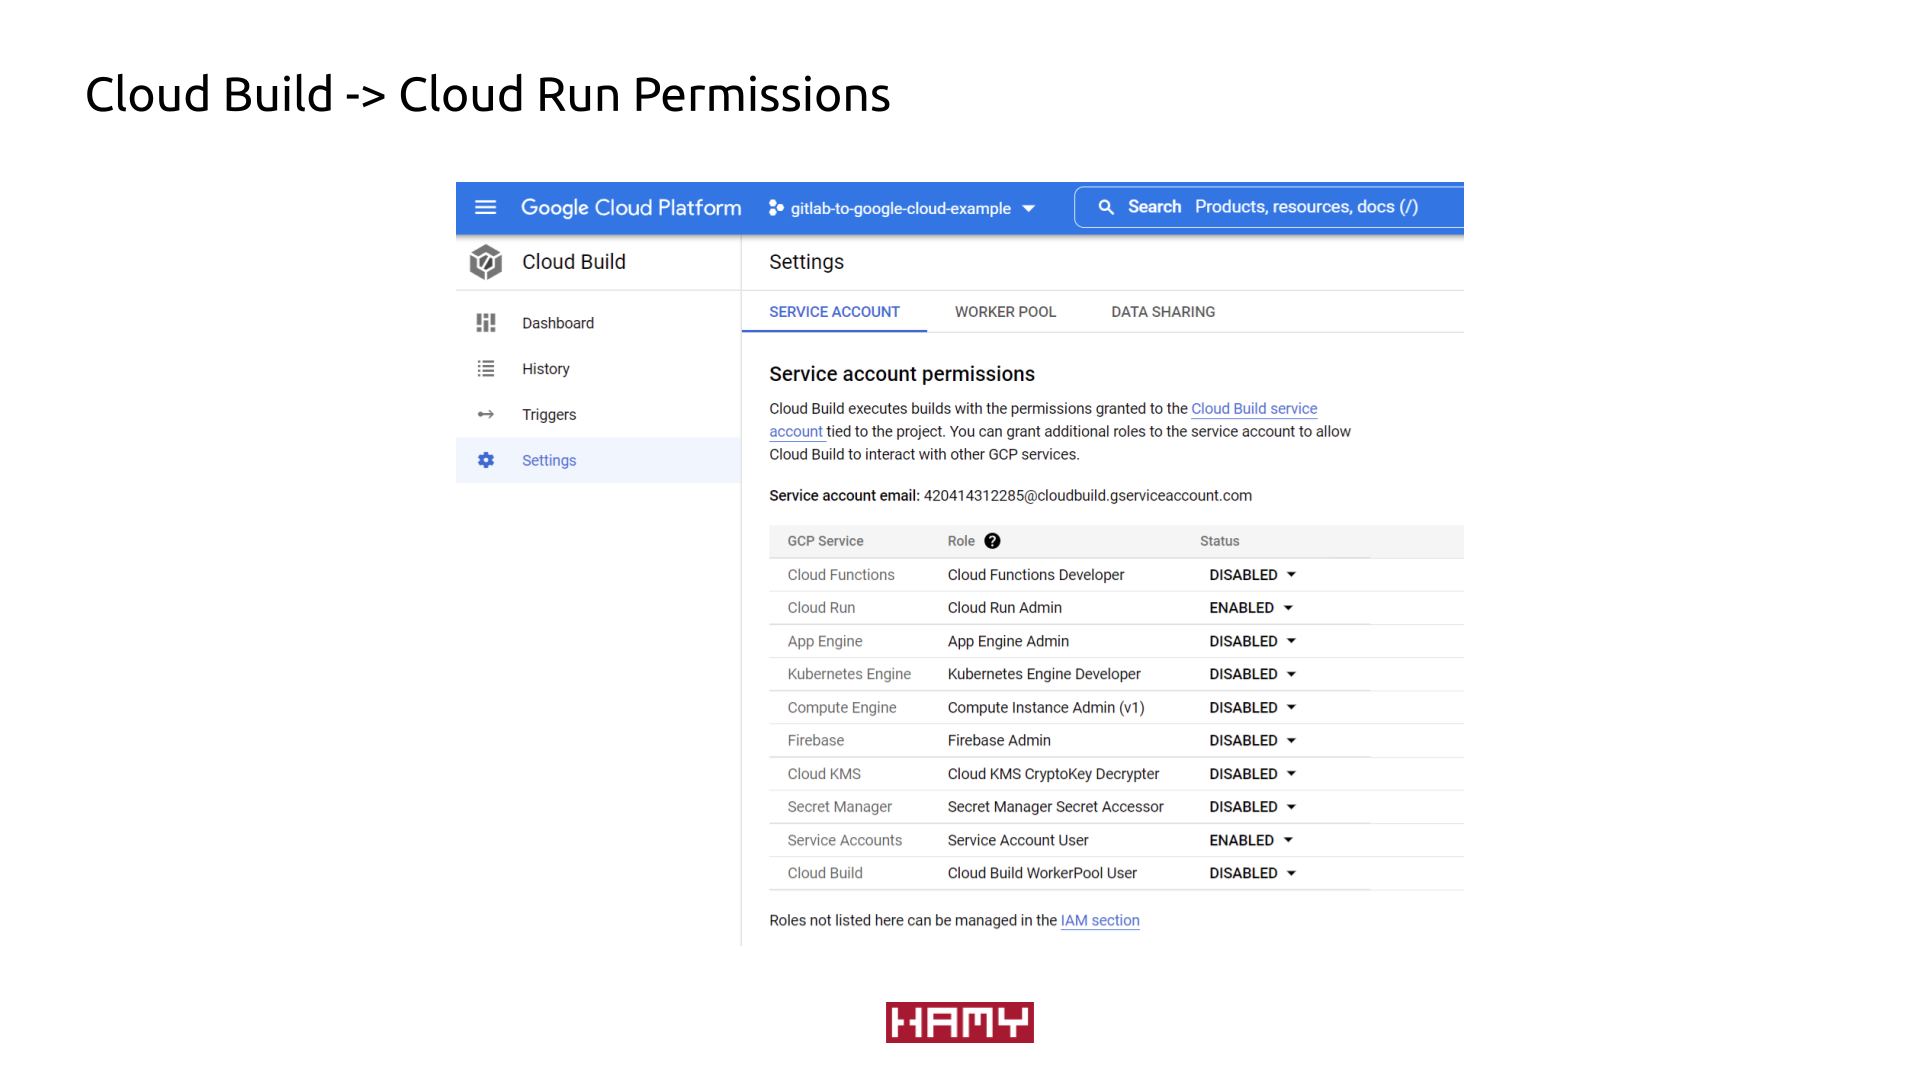
Cloud Build > SettingsView APIEnable
Cloud Build > SettingsCloud Run Admin: EnabledService Accounts: EnabledIAM & Admin > Service Accounts
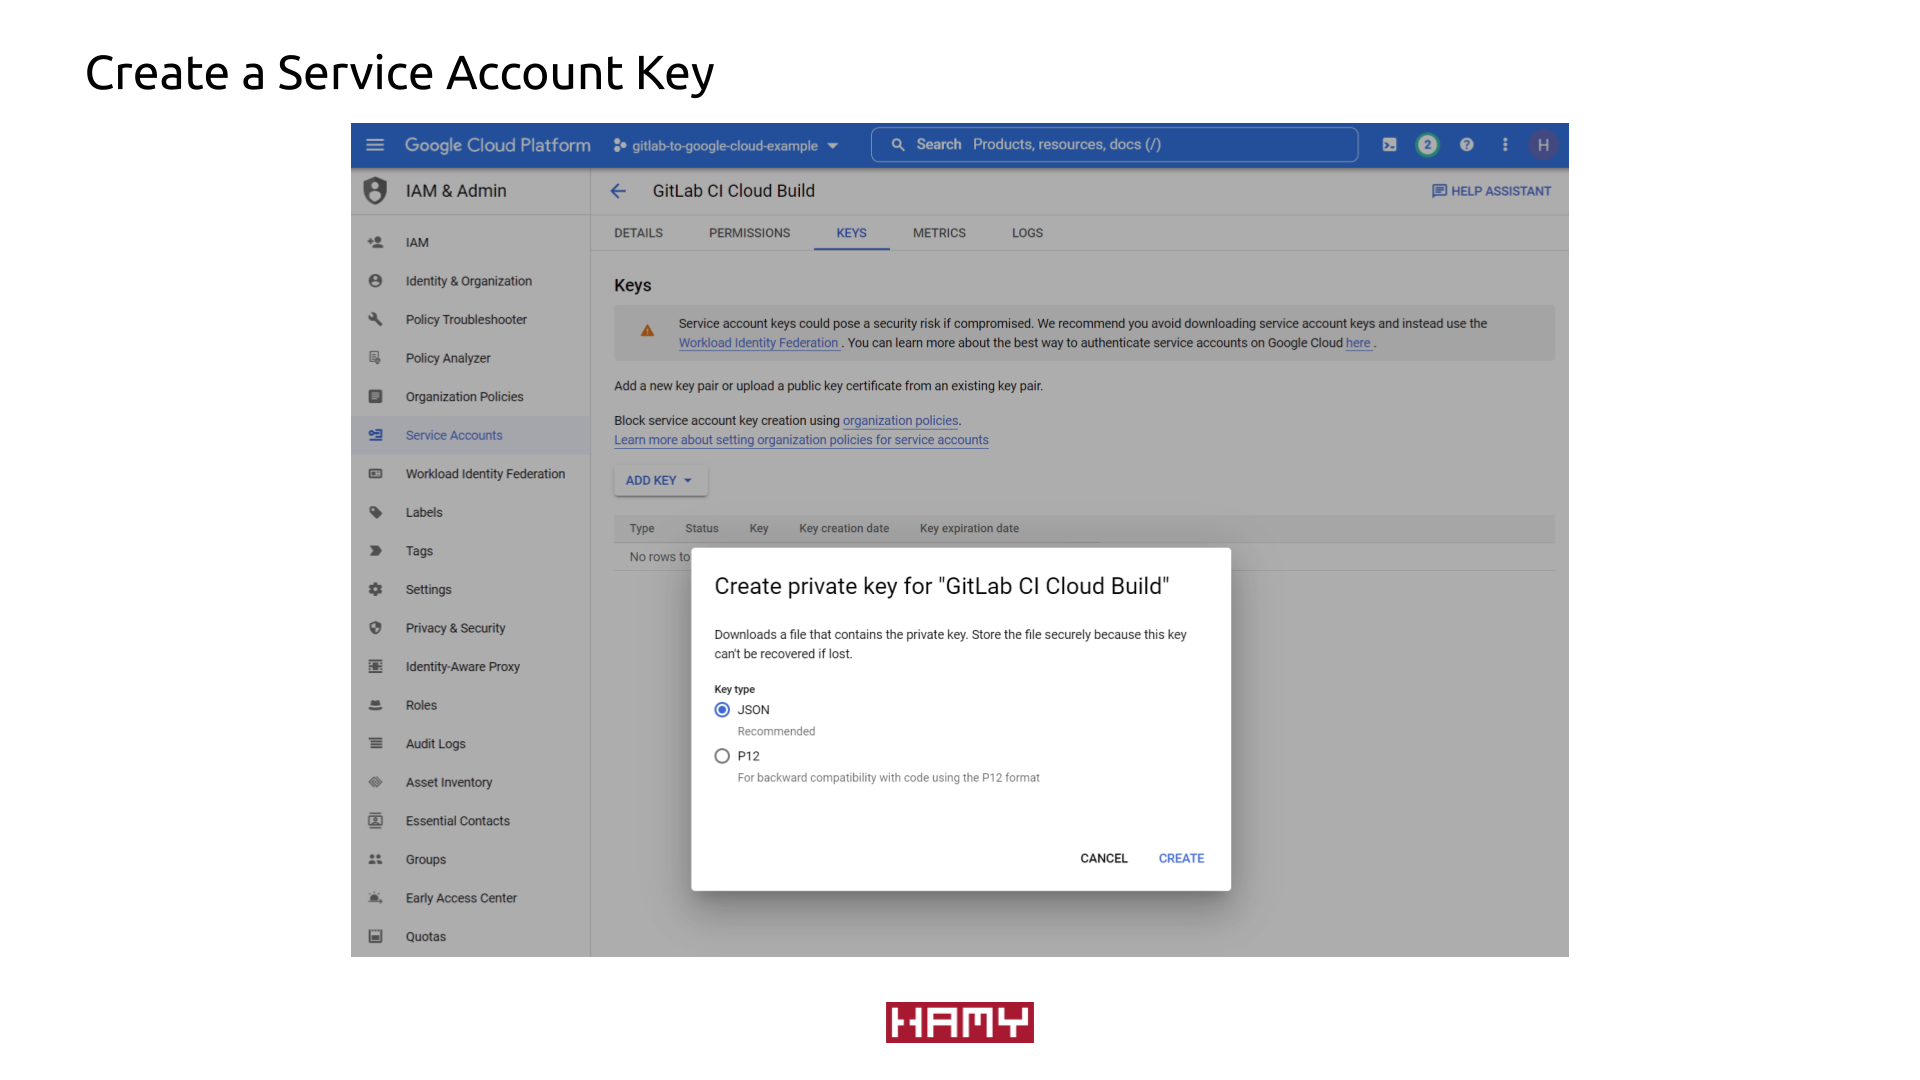
Create Service AccountGitLab CI Cloud BuildCloud Build Service Agent, Cloud Build Editor
Keys tabAdd Key > Create Key > JSONGitLab CI Cloud Build KeyNow that we've got our Google Cloud project setup and ready to receive builds, we can setup our GitLab repo to trigger it.
The first thing we'll setup is our CI variables. These variables will be available to our CI jobs so that they can interact with Google Cloud successfully.
The two variables we need are:
GitLab CI Cloud Build Key (the JSON file we created earlier)We can set these variables by:
Settings > CI/CD > Variables, click ExpandAdd variableNext we'll set up .gitlab-ci.yml. This is a special yaml config in the root of our repo that GitLab reads to determine what jobs it should run when we push.
.gitlab-ci.yml
stages:
  - deploy

deploy_prod:
  stage: deploy
  image: google/cloud-sdk:alpine
  environment: PROD
  only:
  - master
  script:
  - echo $GCP_CLOUD_BUILD_SERVICE_KEY > /tmp/gcloud-service-key.json
  - gcloud auth activate-service-account --key-file /tmp/gcloud-service-key.json
  - gcloud config set project $GCP_PROJECT_ID
  - gcloud builds submit . --config=cloudbuild.yaml

after_script:
- rm /tmp/gcloud-service-key.json
This file says:
master branch updates
cloudbuild.yaml (which we'll make in a sec)The final thing we need to do is setup our Cloud Build config. This tells Cloud Build what we want it to do when we trigger it from GitLab.
cloudbuild.yaml
steps:
    # App
    # [App] build the container image
  - name: 'gcr.io/cloud-builders/docker'
    args: [ 'build', '-t', 'gcr.io/$PROJECT_ID/app', './App' ]
    # [App] push the container image
  - name: 'gcr.io/cloud-builders/docker'
    args: [ 'push', 'gcr.io/$PROJECT_ID/app']
    # [App] deploy container to Cloud Run
  - name: "gcr.io/cloud-builders/gcloud"
    args: [
      'run',
      'deploy',
      'app',
      '--image',
      'gcr.io/$PROJECT_ID/app',
      '--region', 'us-central1',
      '--platform', 'managed',
      '--allow-unauthenticated']
    # Web
    # [Web] build the container image
  - name: 'gcr.io/cloud-builders/docker'
    args: [ 'build', '-t', 'gcr.io/$PROJECT_ID/web', './Web' ]
    # [Web] push the container image
  - name: 'gcr.io/cloud-builders/docker'
    args: [ 'push', 'gcr.io/$PROJECT_ID/web']
    # [Web] deploy the container to Cloud Run
  - name: "gcr.io/cloud-builders/gcloud"
    args: [
      'run',
      'deploy',
      'web',
      '--image',
      'gcr.io/$PROJECT_ID/web',
      '--region', 'us-central1',
      '--platform', 'managed',
      '--allow-unauthenticated']
This file says:
To verify the deploy, we can:
CI/CD > PipelinesCloud Build > HistoryCloud Run > YOUR_SERVICE > RevisionsIf there are any failures, you can find more information for debugging in the logs.
The best way to support my work is to like / comment / share for the algorithm and subscribe for future updates.